
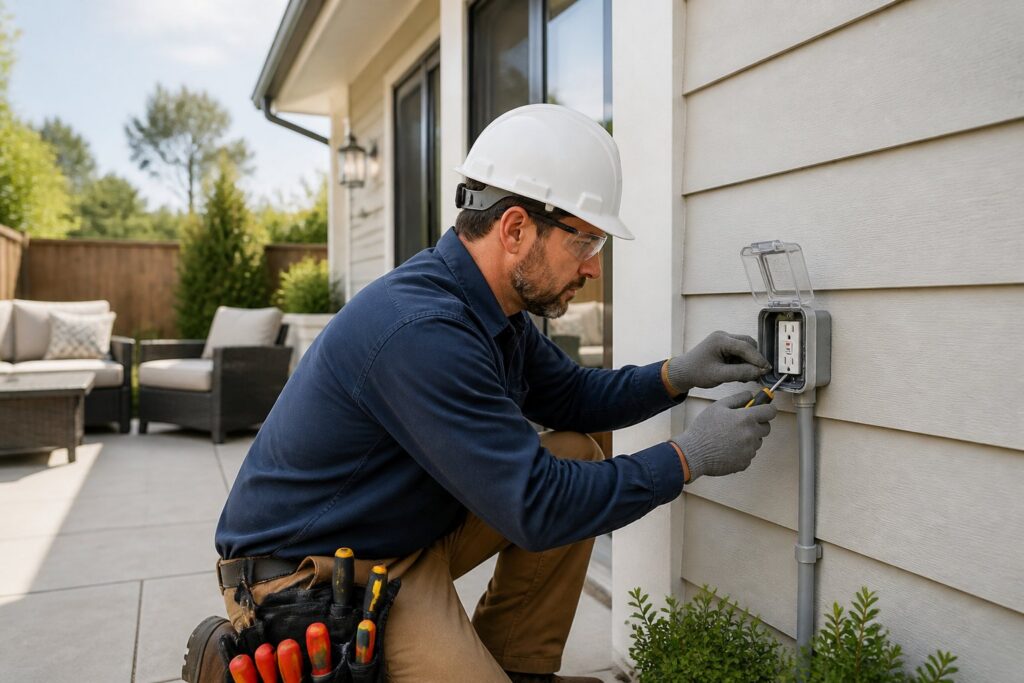
Putting an outdoor outlet on your patio just makes life easier. You can plug in string lights, speakers, a phone charger, or maybe a blender for those summer drinks—without dragging an extension cord through a window.
If you’re wondering how to install outdoor outlets safely, you’ll need to plan the circuit, use weather-rated parts, follow GFCI rules, and test the outlet before calling it done. That’s what keeps your home, patio, and everyone using it safer.
A patio outlet really is a practical upgrade—if you do it right. The catch? Outdoor wiring faces rain, moisture, and wear, so you can’t treat it like an indoor project.
Planning the Power Source
Start with the circuit, not the box. The best patio outlet is easy to reach, protected from bumps, and on a circuit that can actually handle the extra load.
Choosing the Best Location
Pick a spot that serves the patio but doesn’t make people trip over cords. A wall near your seating area is usually a good bet, as long as it’s not in a splash zone and you can get to it.
Try to put it where the cover can open all the way, and where it won’t be blocked by furniture or grills. I like to think ahead—maybe you’ll want string lights or a TV someday, so make it useful for more than just one thing.
Checking Circuit Capacity
Before adding anything, check if the existing circuit has enough capacity. If it already runs space heaters, kitchen gadgets, or lots of other outlets, adding more could trip the breaker or even overload it.
Look at the breaker size and what’s already plugged in. If you’re not sure, a licensed electrician can test it and let you know if you need a new dedicated circuit.
Safety Codes and Weather Protection
Outdoor outlets need more than just a regular indoor plug. You’ll need GFCI protection, weather-resistant parts, and a cover that keeps water out—even when something’s plugged in.
GFCI Requirements
A patio outlet needs GFCI protection to cut shock risk if moisture sneaks in. Most outdoor outlets require it right at the outlet or somewhere upstream.
Test the GFCI after installing it and after any power outage. If the reset button won’t stay in, stop using the outlet and track down the problem.
Weatherproof Boxes and Covers
You want a weatherproof box and an in-use cover made for outside. The cover should keep the outlet dry, whether you’re using it or not.
Always pick weather-resistant devices listed for outdoor use. Don’t skimp here—a tight seal really matters. Rain, sprinklers, and humidity will ruin a regular outlet in no time.
Tools and Materials Needed
A clean install depends on using the right stuff from the start. Good materials make the outlet safer and easier to maintain.
Essential Electrical Components
You’ll need a weatherproof electrical box, a GFCI receptacle or GFCI protection from the circuit, outdoor-rated cable, wire connectors, an in-use cover, and mounting hardware. Adding an outlet to an existing wall? You might also need cable clamps and a box extension.
Make sure every part is rated for outdoors where needed. Indoor-only parts just aren’t safe outside.
Recommended Safety Gear
Wear insulated gloves, safety glasses, and dry shoes while you work. A non-contact voltage tester is a must—don’t touch wires unless you know they’re dead.
Keep a flashlight handy in case you’re working in a dim spot or after dark. A small level and a good screwdriver set help too.
Step-by-Step Installation Process
The steps aren’t complicated, but each one counts. Cut the power, mount the box, wire it right, and seal it up tight.
Shutting Off and Testing Power
Turn off the breaker for the circuit and check the wires with a voltage tester. Don’t trust the breaker labels—those are often wrong.
Test at the outlet or junction box where you’re pulling power. If the tester still shows voltage, stop and find the right breaker before you go any further.
Running Cable and Mounting the Box
Run outdoor-rated cable from the source to the new spot, keeping the path protected and as short as possible. Secure the cable so it can’t move or rub on anything sharp.
Mount the weatherproof box solidly to the wall or post. It should sit flat, stay level, and leave enough space for the receptacle and cover.
Wiring the Receptacle Correctly
Connect the hot, neutral, and ground wires to the right terminals. Using a GFCI? Make sure the incoming power lands on the line terminals, not load.
A loose or backwards connection can kill the outlet or create a shock risk. Tighten every screw and keep bare copper tucked away—no stray strands touching the box or another terminal.
Securing the Cover and Seal
Put on the cover and seal all the openings with approved exterior sealant. You want to keep water out but still be able to use the outlet.
Check the cover closes all the way and that the gasket sits flat. If the seal is sloppy, water will get in eventually, even if the outlet works at first.
Testing Performance and Troubleshooting
Once the outlet’s in, test it right away. It should work, trip when it’s supposed to, and reset with no fuss.
Verifying GFCI Operation
Hit the test button on the GFCI and make sure power shuts off. Press reset and check that the outlet comes back on.
Plug in a lamp or tester to see if it works under load. If it trips for no reason, you might have a wiring problem, or maybe moisture is getting in.
Fixing Common Wiring Issues
If the outlet won’t work, check for a tripped breaker, a loose wire, or a mix-up between line and load on the GFCI. Reversing hot and neutral can cause issues, too.
If it’s flaky—works sometimes, not others—inspect the connections and the weatherproof cover. Outdoor moisture, a bad splice, or a damaged cable can all cause weird problems.
When to Hire a Licensed Electrician
Some patio outlet jobs are fine for experienced DIYers, but others really need a pro. If you’re dealing with complicated wiring, panel work, underground runs, or permit questions, just call an electrician.
Projects That Need Professional Help
Call a licensed electrician if you need a new circuit, panel upgrade, aluminum wiring work, or a long run to a detached patio. Also get help if the breaker keeps tripping, your home is older, or you’re powering big stuff like an EV charger or outdoor kitchen.
Why Magnify Electric Is the Right Choice
Magnify Electric’s a solid pick if you want licensed electricians who actually care—whether it’s a simple fixture swap or a full upgrade. Our team handles automated lighting, ceiling fans, light switches, Lutron smart home systems, EV charging outlets and wall chargers, outdoor lighting, outlet services, recessed lighting, TV installs, whole-home surge protectors, wiring, lighting installs, panel upgrades and repairs, troubleshooting, electrical repairs, portable generator hookups, smoke and CO₂ detectors, and all sorts of electrical improvements for homes and businesses.
We serve Spicewood, Austin, Bee Cave, Lakeway, Dripping Springs, Georgetown, Leander, Round Rock, Kyle, Cedar Park, Liberty Hill, Westlake, The Hills, Briarcliff, Horseshoe Bay, Sunset Valley, Hutto, and nearby Central Texas spots. If you want safe work, clear communication, and real support for emergencies, Magnify Electric brings practical know-how to patio outlets and plenty more.
Frequently Asked Questions
Do I need a permit to add an outdoor electrical outlet on my patio?
In many places, yes—especially if you’re adding new wiring or a circuit. Rules vary by city and county, so check your local requirements before starting.
What type of weatherproof outlet and cover should I use outdoors?
Use a weather-resistant receptacle, a weatherproof box, and an in-use cover rated for outdoors. The cover should protect the outlet, even with a cord plugged in.
How do I make sure the new patio outlet is GFCI-protected?
Install a GFCI receptacle at the outlet or use GFCI protection upstream. After installing, press the test and reset buttons to make sure it’s working.
What’s the safest way to run wiring from the house to a patio outlet?
Use outdoor-rated cable and run it through a protected path that meets local code. Keep it secure, avoid damage, and use proper boxes and fittings for every wall entry or exit.
How high should an outdoor outlet be mounted, and where should it be placed?
Mount it high enough to stay clear of splashes and ground moisture, but still easy to reach. Near the patio’s main use area and away from foot traffic or direct water is usually best.
How can I tell if my existing electrical circuit can handle an additional outdoor outlet?
Start by looking at the breaker size and figuring out what’s already running on that circuit. If you’re not totally sure, or if you notice the circuit is already handling a bunch of devices, it’s probably best to call a licensed electrician to test things out before you plug in anything new.