If you want to install or upgrade a 20 amp outlet, you need to understand the correct wiring for safety and efficiency. For a 20 amp circuit, use 12-gauge wire to handle the higher electrical load safely.
Using the right wire size prevents overheating and electrical hazards. Knowing how to connect the wires properly is just as important.
Connect the black wire to the brass terminal. Connect the white wire to the silver terminal, and the bare or green wire to the ground terminal.
These steps make your wiring job smooth and safe. Whether you’re adding a new outlet or fixing an old one, understanding these details saves you time and trouble.
Understanding 20 Amp Outlets
20 amp outlets handle more electric current than standard outlets. Knowing what makes them different from 15 amp outlets helps you decide if they’re right for your space.
What Is a 20 Amp Outlet?
A 20 amp outlet is an electrical socket made to support up to 20 amps of current. It uses thicker wires, usually 12-gauge, to carry the higher current safely.
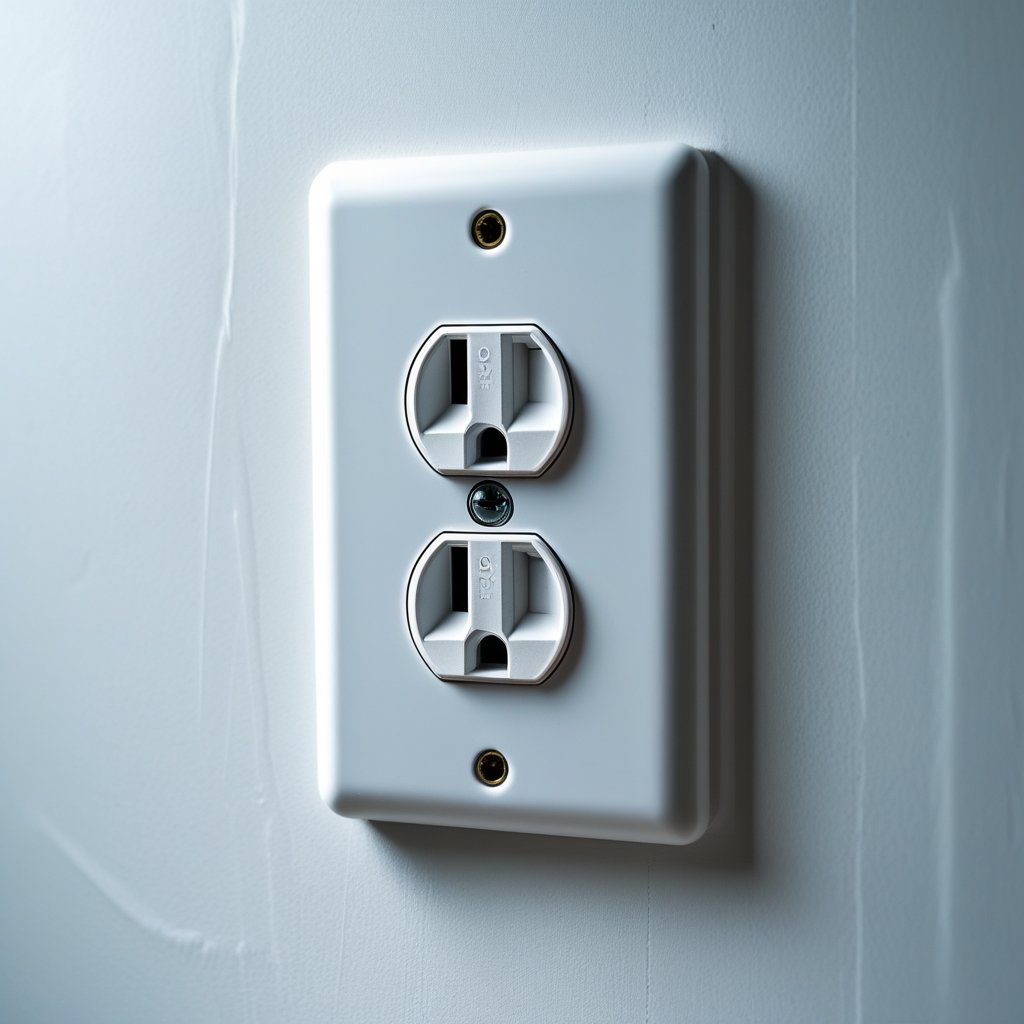
You can recognize a 20 amp outlet by its T-shaped slot on one plug opening. This shape prevents plugging in devices that require less current and protects your electrical system.
Differences Between 15 Amp and 20 Amp Outlets
The main difference between 15 amp and 20 amp outlets is power capacity. A 15 amp outlet supports up to 15 amps, or about 1,800 watts.
A 20 amp outlet handles about 2,400 watts. 15 amp outlets use 14-gauge wire, while 20 amp outlets require thicker 12-gauge wire.
The 20 amp outlet’s T-shaped slot prevents incorrect plug use.
Common Uses for 20 Amp Outlets
You’ll find 20 amp outlets in kitchens, laundry rooms, and garages. These outlets support heavy appliances like microwaves, air conditioners, or power tools.
A 20 amp circuit can often support up to 13 outlets safely.
Electrical Requirements for 20 Amp Outlet Wiring
When wiring a 20 amp outlet, focus on the right wire size, outlet placement, and the proper circuit breaker. Each part keeps your installation safe and efficient.
Wire Gauge and Types
For a 20 amp circuit, use 12-gauge wire if you use copper. This size handles the current without overheating.
If you use aluminum wire, use 10-gauge instead. The wire should be rated for residential use and have proper insulation.
Never use smaller wire like 14-gauge for a 20 amp circuit. Always inspect your wire for damage before installation.
Outlet Locations and Spacing
You can place up to 10 outlets on a single 20 amp circuit. Space outlets to avoid overloading any part of the circuit.
The National Electrical Code (NEC) suggests placing outlets every 12 feet for convenience and safety. This lets you plug in devices without using extension cords.
Circuit Breaker Selection
Use a 20 amp circuit breaker for a 20 amp outlet circuit. The breaker cuts off power if the current goes above 20 amps, preventing damage and fires.
Make sure the circuit breaker matches your panel and fits your home’s electrical system. Using the wrong breaker size can cause frequent tripping or dangerous wiring.
Tools and Materials Needed for 20 Amp Wiring
To wire a 20 amp outlet, gather the right tools and materials for safety and proper function. You’ll need tools for cutting and connecting wires, safety gear, and the correct outlets and boxes.
Essential Tools
You need a few key tools for 20 amp wiring. Use wire strippers to remove insulation from wires.
A screwdriver (flathead and Phillips) is needed for removing outlet covers and securing wires. A voltage tester helps you confirm the power is off before you start.
Use a wire cutter to trim wires and needle-nose pliers to bend wires. Have 12-gauge wire ready, as this is standard for 20 amp circuits.
Recommended Safety Equipment
Wear insulated gloves to protect your hands from electric shock. Safety goggles protect your eyes from wire pieces or sparks.
Turn off power at the circuit breaker before starting. Use a non-contact voltage tester to double-check that the wires are not live.
Work in a well-lit area to see clearly. If you’re unsure about anything, ask a professional.
Choosing the Right Outlets and Boxes
Use outlets rated for 20 amps, usually marked with a “20A” symbol. These outlets have a specific shape for higher power plugs.
Choose an outlet box that can hold the wiring safely and fits your wall space. Metal or plastic boxes are available, but make sure they are deep enough for 12-gauge wires.
If you connect multiple wires, use a junction box for safety and code compliance.
Step-by-Step Guide to Wiring a 20 Amp Outlet
Wiring a 20 amp outlet requires careful attention to safety and proper steps. Turn off the power, run the correct cable, connect the wires, and install the outlet securely.
Turning Off the Power
Turn off the power at the circuit breaker before you start. Find the correct breaker and switch it off.
Use a voltage tester at the outlet or wires to confirm the power is off. Always double-check the power before working.
Running the Electrical Cable
Use 12-gauge wire for a 20 amp outlet. This wire size handles the higher current safely.
Route the cable from your power source or existing outlet to the new outlet location. Keep the wire inside the wall or use a protective conduit if needed.
Leave enough wire length at the new outlet box for easy connections. Avoid sharp bends and keep the wire away from heat sources.
Connecting the Outlet Terminals
A 20 amp outlet has three main terminals: hot (brass), neutral (silver), and ground (green). Connect the black hot wire to the brass terminal.
Connect the white neutral wire to the silver terminal. Attach the bare or green ground wire to the green screw.
Tighten each wire securely. Use the terminal marked for 20 amp wiring.
Installing the Outlet and Wall Plate
Push the wires back into the outlet box carefully. Avoid pinching or damaging the wires.
Secure the outlet with the screws and make sure it is straight. Attach the wall plate over the outlet for protection and a finished look.
Turn the power back on and test the outlet with a plug-in tester.
Testing and Troubleshooting 20 Amp Outlets
Testing and fixing your 20 amp outlet keeps your home safe. Check if the voltage is right and spot common problems.
Testing for Proper Voltage
Use a multimeter to measure the outlet’s voltage. A 20 amp outlet should show close to 120 volts on a standard U.S. circuit.
Set your multimeter to AC voltage and touch the probes to the outlet’s hot and neutral slots. If the reading is below 110 volts or above 125 volts, there may be a wiring problem or an issue with your circuit breaker.
Test the outlet’s ground slot for a good connection. Turn off the breaker before opening the outlet for any testing.
Identifying Common Mistakes
Always use 12-gauge wire for a 20 amp circuit. Using thinner wire like 14-gauge can cause overheating.
Connect the ground wire properly. The green or bare copper wire must be securely attached to the outlet’s ground terminal.
Check the outlet orientation—hot wire on brass, neutral on silver, ground on green. Swapping these can cause a shock hazard.
Fixing Wiring Issues
If you find voltage problems or loose connections, turn off the breaker. Remove the outlet cover and check all wire terminals.
Tighten any loose wires. Replace any worn or damaged wires using 12-gauge wire.
Make sure the hot (black or red) wire is on the brass screw, neutral (white) on the silver, and ground (green or bare) on the green screw. If you see burnt marks or melted insulation, replace both the outlet and damaged wires.
After fixing, test the outlet again to confirm the voltage is steady.
Safety Tips for 20 Amp Outlet Installation
Follow safety steps when installing a 20 amp outlet. Use the right materials and understand how GFCI outlets work.
Electrical Code Compliance
Follow your local electrical codes. For a 20 amp circuit, use 12-gauge wire for copper.
Your circuit breaker must match the wire size and outlet rating. A 20 amp breaker protects a 20 amp outlet.
Check the breaker and wiring before installing. If your circuit is rated for 15 amps, do not install a 20 amp outlet without upgrading the wiring and breaker.
Working With GFCI Outlets
If you install outlets in wet or outdoor areas, use GFCI outlets for safety. GFCI outlets cut power quickly if they detect a ground fault, which helps prevent electric shock.
When you add a GFCI outlet, keep both the existing and new outlets on the same GFCI circuit. Test the GFCI outlet regularly by pressing the test button.
Wear rubber-soled shoes and use insulated tools when working with GFCI outlets. This reduces the risk of electric shock during installation.
Protecting Against Overloads
A 20 amp circuit should not be overloaded. Use about 16 amps total to avoid tripping the breaker.
Limit the number of outlets on one circuit. Thirteen outlets are usually the maximum for a 20 amp breaker, but your load may change this number.
Mount all outlets securely with no loose connections. Loose wiring can cause sparks or overheating, which may start a fire.
Useful tip: Strip about 3/4 inch of insulation from wires for a good connection. Stripping too much or too little can make the connection unsafe.
Upgrading and Replacing Existing Outlets
If you want to add more power capacity to your home or replace old outlets, you need to know when an upgrade is needed and how to handle wiring safely.
When to Upgrade to 20 Amp Outlets
You should upgrade to 20 amp outlets if your current outlets can’t handle your appliances’ power demands. High-power devices like microwaves, power tools, or space heaters may need more than a 15 amp outlet.
Homes built to newer electrical codes often require 20 amp circuits for kitchens, garages, and workshops. Use 12-gauge wire for 20 amp circuits, as it supports higher current.
Check your breaker panel to make sure it matches the outlet rating. Never mix 15 amp breakers with 20 amp outlets, as this can cause safety issues.
Replacing Old Wiring
Before installing 20 amp outlets, inspect your wiring. Old wiring may be damaged or too thin for heavier loads.
Replace wires smaller than 12 gauge if you want a 20 amp outlet. Look for signs like cracked insulation or fraying.
When stripping wires, remove about 3/4 to 1 inch of insulation for a secure connection. Make all wire connections tight.
Always turn off the power at the breaker before working on wiring to avoid shocks.
Hiring a Qualified Electrician
If you’re unsure about your skills or local electrical rules, hire a licensed electrician. Electricians check your wiring, make sure you use the right wire gauge, and install outlets safely.
They also help with permits and inspections required by your area. Using a professional reduces the risk of mistakes that can cause fires or equipment damage.
They can upgrade panels if your current one can’t support new outlets. Working with electricity can be dangerous, so get expert help when needed.
Maintenance and Long-Term Care
Keeping your 20 amp outlet wiring safe means watching how it performs over time and fixing problems early. Regular checks and dealing with signs of damage help you avoid hazards.
Regular Inspection and Testing
Inspect your 20 amp outlets at least twice a year. Look for loose plugs or outlets that feel warm.
Both issues can signal poor connections or overload. Use a simple outlet tester to spot wiring faults like reversed polarity or no ground.
These tests only take a few minutes and help ensure safety. If you notice flickering lights or tripped breakers often, check the circuit load.
Too much draw on a 20 amp circuit causes problems. Make sure your wiring (12 AWG copper wire) matches the circuit rating to handle the current safely.
Addressing Wear and Tear
Outlets and wiring wear out after years of use. Cracks in the outlet casing or damaged wires need quick replacement to prevent shocks or fires.
Pay special attention to the grounding slot, which adds important safety. If plugs don’t fit tightly, replace the outlet to stop arcing.
Arcing wears down the outlet and creates dangerous sparks. Use only outlets rated for 20 amps on these circuits.
Mixing 15 amp outlets can cause overheating and damage. Worn wiring or outlets can lead to serious safety issues if not fixed.
Frequently Asked Questions
Wiring a 20 amp outlet means using the right wire gauge, following steps for GFCI outlets, and matching the outlet and breaker properly. You also need to know how to wire both 120 volt and 240 volt setups, plus tips for certain brands.
What wire gauge should I use for a 20 amp outlet?
Use 12-gauge wire for a 20 amp outlet. This wire size handles the current without overheating.
Do not use 14-gauge wire because it is only rated for 15 amps.
Can you provide a step-by-step on wiring a 20 amp GFCI outlet?
First, turn off power at the breaker. Connect the black (hot) wire to the brass terminal.
Attach the white (neutral) wire to the silver terminal. Attach the ground wire to the green grounding screw.
Connect the wires to the correct “line” terminals if your GFCI has separate “load” and “line” sections. Carefully tuck the wires into the box and secure the outlet.
What is the correct way to wire a 120 volt 20 amp outlet?
Use a 12-gauge black (hot), white (neutral), and ground wire. Connect the black wire to the brass terminal, the white wire to the silver terminal, and ground to the green screw.
Make sure your circuit breaker is a 20 amp breaker.
How do I install a 240 volt 20 amp plug?
For 240 volts, use a double-pole 20 amp breaker. You will need two hot wires (usually black and red), a neutral, and a ground.
Connect each hot wire to the breaker, neutral to the neutral bar, and ground to the grounding bar. Make sure your outlet is rated for 240 volts.
Which breaker should I use for a 20 amp circuit?
Use a 20-amp breaker for a 20 amp circuit. This ensures the breaker can handle the current safely.
Never use a higher amp breaker on a circuit with smaller gauge wiring.
Are there any specific considerations when installing a Leviton 20 amp outlet?
Leviton 20 amp outlets usually have a T-shaped slot for 20 amp plugs.
Check that your wiring uses 12-gauge wire. Make sure you have a compatible 20 amp breaker.
Follow the manufacturer’s instructions to connect the hot, neutral, and ground wires.