
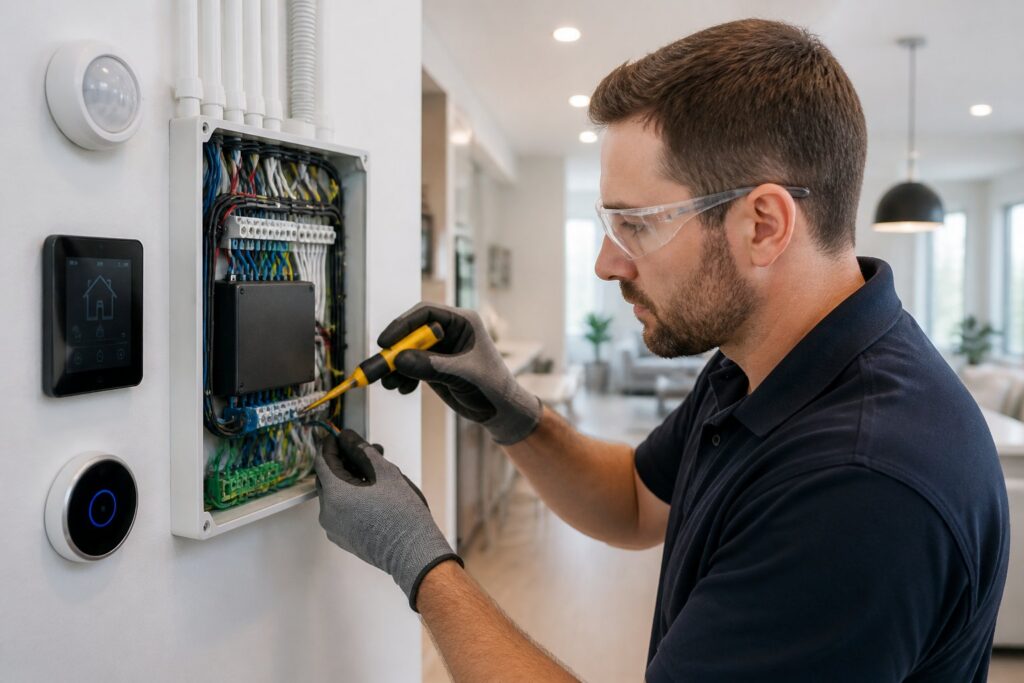
So, you’re looking into how to wire a home for smart automation? Honestly, the safest way to start isn’t by buying a bunch of gadgets—it’s by mapping things out. You’ll want enough electrical capacity, solid network wiring, and a setup that actually fits how you live, not just what looks cool on a box.
A good smart home wiring plan gives you reliable power, strong network coverage, and room to expand without having to rip walls open later. That means thinking through lights, switches, cameras, doorbells, internet, and control hubs before you get trigger-happy with the shopping cart.
A smart setup can be basic or pretty advanced, but the wiring needs to be solid either way. If you get the bones right, daily life just gets easier, and you’ll dodge a lot of headaches—like dead zones and surprise service calls—down the line.
Define Your Automation Goals
Figure out which devices and routines really matter to you. A focused plan keeps the system useful, avoids running cables you’ll never need, and helps you pick the right electrical and network setup from the start.
Prioritize Daily-Use Devices
Make a list of things you actually want to control often: lights, ceiling fans, thermostats, entry locks, garage doors, security cameras. If it’s part of your daily routine, give it more attention than something you’ll only mess with once in a blue moon.
I usually suggest starting with the rooms and tasks that impact comfort and safety—think kitchen lighting, bedroom switches, front-door access, and outdoor lights. Those spots always seem to matter most.
Choose Between Room-By-Room and Whole-Home Planning
Room-by-room plans work if you’re updating slowly or just remodeling one area. Whole-home planning makes more sense if you’re building from scratch, replacing major wiring, or want everything to play nicely together.
Whole-home setups are easier to expand later since you can group circuits, data runs, and control points in a logical way. Room-by-room upgrades are fine too, just leave enough space in the panel, wall boxes, and media areas for future add-ons.
Build the Right Electrical Foundation
Smart automation needs steady power and a panel that can handle the extra load. You’ll also want to think about which gadgets deserve their own circuits and how to protect sensitive gear from power spikes.
Evaluate Panel Capacity and Circuit Layout
Check how much space is left in your panel and whether your circuits are already pushed to the limit. Smart lighting, kitchen gear, EV charging, and home office stuff can add up quickly.
A clean circuit layout makes troubleshooting way easier. When circuits are labeled and grouped by use, you can isolate problems fast and skip the confusion during upgrades.
Plan Dedicated Power for High-Demand Equipment
Some things just shouldn’t share power with a bunch of other devices. EV chargers, big entertainment systems, network racks, and certain smart controllers run better on their own circuits.
Dedicated power helps prevent nuisance trips and keeps sensitive equipment stable. Plus, it gives you a cleaner path for future upgrades if you add more connected stuff later.
Add Surge Protection for Sensitive Electronics
Whole-home surge protection is a smart move if you’re running connected lighting, hubs, cameras, and network gear. It can help shield your stuff from utility spikes and surges caused by motors or big appliances.
Point-of-use protection is still useful—especially for TVs, routers, and audio gear. For best results, pair surge protection with solid grounding and let a licensed electrician check your panel.
Plan Low-Voltage and Network Infrastructure
Smart homes need more than power. You’ll want good data paths, reliable Wi-Fi, and a central spot for internet, hubs, and controllers—somewhere that isn’t a tangled mess or a dead zone.
Select Data Cable Paths and Equipment Locations
Run Ethernet to places where you’ll want rock-solid connections: TVs, office desks, ceiling access points, cameras, and media gear. It’s so much easier to pull cable during construction or a remodel than after drywall is up.
Try to keep cables away from heat, moisture, and sharp bends. A tidy low-voltage setup makes testing easier, especially when you’re tracing one line out of a dozen.
Create Reliable Wi-Fi and Hardwired Coverage
Wi-Fi’s great for mobile stuff and plenty of smart products, but hardwired connections still win for reliability—especially for key gear. Usually, a mix of both works best.
Put access points where they’ll cover the house evenly, not hidden behind a concrete wall or a pile of boxes. In bigger homes, a hardwired backhaul can make wireless much more consistent.
Prepare Central Spaces for Hubs and Controllers
A structured media panel, utility closet, or equipment cabinet can corral routers, switches, hubs, and power supplies in one spot. That cuts down on cable chaos and makes maintenance less of a pain.
Leave some room for airflow and future gear. If you cram everything in from day one, you’ll regret it when you want to upgrade.
Map Devices, Controls, and Sensors
The best wiring plan matches device locations to how you actually move through your home. Smart switches, sensors, and cameras should go where they genuinely improve your day-to-day routine.
Place Smart Switches and Dimmers Strategically
Install smart switches where you naturally reach for the lights—entrances, hallways, kitchens, stairways. Honestly, smart switches are usually more practical than smart bulbs because anyone can use them.
Dimmers are great in living rooms, dining rooms, and bedrooms where you want to adjust lighting. If you’re thinking ahead, use deeper wall boxes so you don’t run into fit issues later.
Coordinate Lighting Scenes With Occupancy Detection
Occupancy sensors can trigger lighting scenes automatically when someone enters a room. This works especially well in laundry rooms, bathrooms, closets, garages, and hallways.
Match sensor placement to the room and how people move through it. If a sensor points at a door or busy walkway, you might end up with lights flicking on and off at the wrong times.
Prewire for Cameras, Doorbells, and Access Points
Security cameras and doorbells really benefit from a reliable wired connection and steady power. Prewiring gives you better placement options and means you’re not stuck relying on batteries.
Ceiling access points also work better with a planned cable route. If you know where they’ll go before finishes are up, you can get better coverage and a cleaner look.
Choose Systems That Can Grow With the Property
The smartest wiring plans leave space for change. Your equipment will probably change over time, so your wiring and control setup should make expansion simple—not a nightmare.
Compare Open Ecosystems With Proprietary Platforms
Open ecosystems usually offer more flexibility when adding different brands and device types. Proprietary platforms can feel more polished sometimes, but they might box you in.
If you want long-term options, set up your wiring and equipment so you’re not locked into one system. That way, you can swap devices without starting from scratch.
Plan for Lutron Integration and Future Upgrades
Lutron smart home systems are a solid pick if you want reliable lighting control and room to grow. Planning for that kind of integration early saves a lot of hassle when you add scenes, dimmers, or whole-home lighting control later.
Future upgrades might mean more cameras, extra audio zones, EV charging, or outdoor lighting. A flexible wiring plan makes those add-ons less of a pain.
Avoid Compatibility Problems During Expansion
Mixing devices without a plan leads to app overload and gadgets that just don’t play nice. A clear wiring and control strategy helps you sidestep those headaches.
Keep a master list of what every cable, switch, and sensor does. It makes future upgrades smoother and lets a tech figure things out faster.
Work With a Licensed Electrician for Safe Installation
Some smart home wiring is just planning, but a lot of it needs code-compliant electrical work. A licensed electrician keeps you safe, makes sure you’re up to code, and saves you from costly rework.
Know Which Tasks Require Code-Compliant Electrical Work
Anything inside your panel, new circuits, outlet wiring, panel upgrades, and many lighting changes should be left to a licensed pro. This is true whether it’s new construction, a remodel, or just an update.
Low-voltage work still needs care, especially if it’s near high-voltage wiring or supports security and network systems. Safety and good labeling are just as important as tidy installation.
Schedule Testing, Labeling, and Final Commissioning
A job isn’t done when you twist the last wire nut. Testing should confirm that circuits, switches, sensors, cameras, and network points all work like they’re supposed to.
Label every cable, breaker, and controller zone. When you need service later, clear labels save time and cut down on mistakes.
Choose Ongoing Support for Homes and Commercial Spaces
If you want one crew for both quick fixes and bigger jobs, Magnify Electric is a solid choice for residential and commercial electrical work. They handle automated lighting, ceiling fans, Lutron smart home systems, EV charging, outdoor lighting, outlets, recessed lighting, TV installs, whole-home surge protectors, wiring, panel upgrades, troubleshooting, portable generator hookups, smoke and CO₂ detectors, and all sorts of upgrades for homes and businesses.
You’ll get help with everything from swapping out a simple fixture to major electrical upgrades, commercial lighting, safety checks, smart home integrations, and emergency support. That’s a big deal if you want one local team covering Spicewood, Austin, Bee Cave, Lakeway, Dripping Springs, Georgetown, Leander, Round Rock, Kyle, Cedar Park, Liberty Hill, Westlake, The Hills, Briarcliff, Horseshoe Bay, Sunset Valley, Hutto, and the rest of Central Texas.
Frequently Asked Questions
What wiring and cabling should I run in each room to support future smart devices?
In most rooms, plan for power at the walls, plus Ethernet to TVs, desks, ceiling access points, and camera spots. It’s smart to leave extra conduit or pull paths in key areas so you can add cable later without tearing into finished walls.
Which is better for a smart home: Ethernet, Wi‑Fi, or a mix of both?
Usually, a mix is best. Ethernet is better for fixed devices that need steady performance, while Wi‑Fi covers phones, tablets, and smart gadgets that move around.
Where should I place the structured media panel and cable drops for the best coverage?
Put the structured media panel in a central, ventilated spot with easy access for service. Drop cables where devices will stay put—TV walls, desks, ceiling access points, doorbells, and camera mounts.
How much does smart home prewiring typically cost in new construction or a remodel?
Costs swing a lot depending on rooms, cable runs, device types, and wall access. A basic setup might cost a few thousand, but bigger homes or fancier systems can run higher due to labor, panel work, and network planning.
What are the most common wiring mistakes to avoid when preparing a house for automation?
Common mistakes? Underestimating panel capacity, skipping cable labels, putting Wi‑Fi gear in dead spots, and not planning for growth. Another biggie is mixing low- and high-voltage wiring too closely without thinking it through.
Do I need an electrician for low-voltage smart home wiring, or can I DIY it safely?
Honestly, you can probably tackle some low-voltage stuff on your own—like running cables or organizing wires—if you know what you’re doing and double-check your local codes. But once you’re dealing with anything connected to your main electrical panel, adding circuits, outlets, or messing with lighting controls, that’s when it’s time to call in a licensed electrician. It’s just not worth risking safety or running afoul of the rules.