Running electrical wiring through walls might seem tricky. With the right steps, you can do it safely and correctly.
Plan your route carefully. Use the proper tools and follow local electrical codes to avoid hazards or future problems.
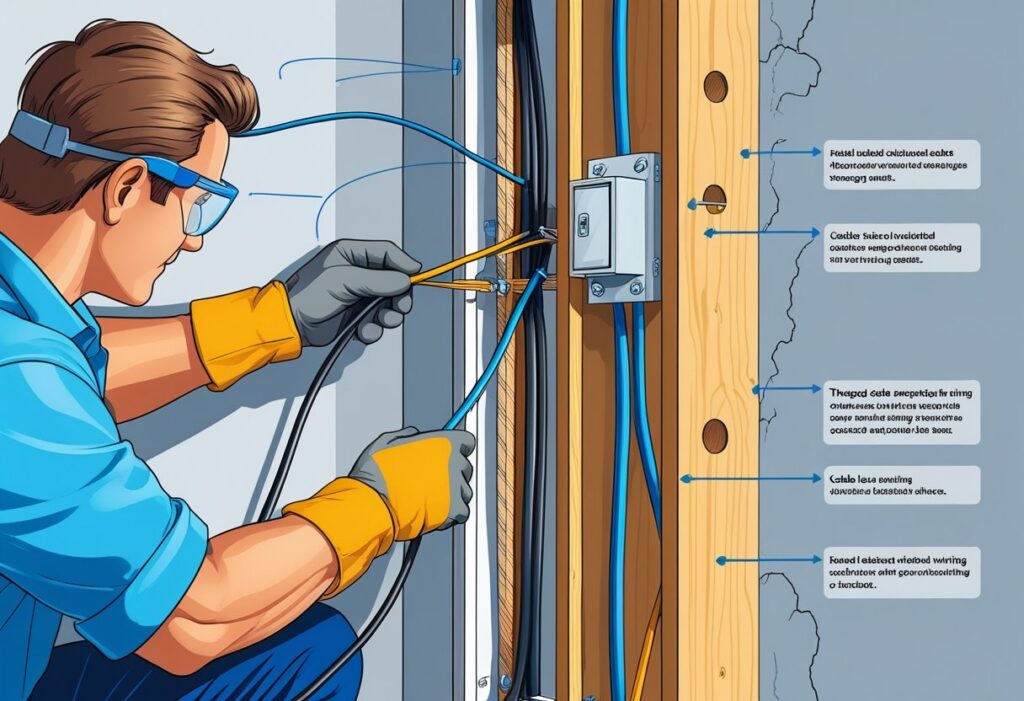
You’ll need to locate wall studs and drill holes for the cables. Protect wires with conduit or staples to prevent damage.
Learn how to work around obstacles like insulation or existing pipes. This helps you keep the job clean and safe.
You can add new outlets, switches, or lighting without calling a professional. This guide explains what you need so your wiring project goes smoothly and safely.
Understanding Electrical Wiring Basics
Wiring through walls takes careful planning and the right knowledge. You need to know the types of wires, safety rules for voltage, and the tools to work with.
Getting these details right helps you avoid hazards. It also makes your job easier.
Types of Electrical Wires
There are several common wires you’ll use inside walls. The most typical are NM (non-metallic) cables, often called Romex, which contain multiple insulated wires inside a plastic sheath.
These usually include a black (hot) wire, a white (neutral) wire, and a bare copper or green (ground) wire. For heavier electrical loads, like stoves or air conditioners, you might need thicker wires, such as 6-gauge or 8-gauge wire.
These wires carry more current without overheating. Use the right type and size for your circuit to prevent overloading and fire risks.
Always check local codes for approved wire types in walls.
Voltage and Safety Standards
Standard home circuits typically use 120 volts for outlets and lights. Larger appliances may require 240 volts.
Understanding your system’s voltage lets you choose the proper wires and breakers. Safety rules require every circuit to have a circuit breaker or fuse to cut power if something goes wrong.
Circuits must include a ground wire to protect against shocks. Grounding sends dangerous electricity into the earth instead of your body.
Follow these key points:
- Don’t overload circuits.
- Always ground outlets.
- Use the right breaker size to match wire capacity.
Ignoring safety rules can lead to fires or electric shocks.
Tools Required for Installing Wiring
Having the right tools makes wiring easier and safer. You’ll need a wire stripper to remove insulation without damaging the wires inside.
A fish tape helps you pull wire through walls or conduit. Use a voltage tester to confirm circuits are off before you start working.
A drill with long bits is useful for making holes in studs for wires. Other helpful tools include screwdrivers for outlet and fixture screws, pliers to twist wires together, and measuring tape for accurate wire length.
Using these tools safely and properly helps you install wiring cleanly and avoid mistakes.
Planning Your Wiring Project
Before you start running wires through your walls, you need to understand the wall layout. Make a clear plan of where the wires will go and check the circuits you already have.
Careful planning helps you avoid damage, follow safety rules, and make your work easier.
Evaluating Wall Structures
Look closely at the walls where you want to run wiring. Different walls have different materials, like drywall, plaster, or wood studs.
Knowing this helps you choose the right tools and prevents unnecessary damage. Check for obstacles inside the walls, such as plumbing pipes, insulation, or other wiring.
Use a stud finder or wire tracer to avoid drilling into pipes or other wires. Some building materials may need extra care, like fireblock insulation or metal studs.
Measure wall thickness and locate studs to safely drill holes for wires. Keep wiring holes at least 1.25 inches from the edge of studs to prevent nails or screws from piercing the wires later.
Creating a Wiring Map
Draw a map of your room’s walls showing where power outlets, switches, and light fixtures will go. Mark studs, electrical boxes, and wiring paths clearly.
This helps you visualize the project and avoid mistakes. Plan the wiring routes to pass through studs at safe points.
Use horizontal or vertical paths that are easy to access. Label each wire on your map by purpose, like “outlet in living room” or “hallway switch.”
Make a list of materials you need: wire types, connectors, junction boxes, and tools. Check electrical codes or local rules for any special requirements, like wire gauge or box sizes.
Checking Existing Circuits
Before adding new wires, check the circuits you already have. Identify the circuit breaker panel and label breakers if needed.
This helps you find the correct circuit and avoid overloading it. Turn off the power at the breaker before working to keep safe.
Use a voltage tester to confirm power is off in the area where you’ll be working. Review the circuit’s load capacity to be sure it can handle new outlets or lights.
A 20 amp circuit usually requires 12-gauge wire. If your plan adds too much load, consider adding a new circuit or upgrading the panel.
Always follow local electrical codes to meet safety standards. If you’re unsure about existing circuits, ask an electrician for help.
Preparing the Workspace
Before running wiring through walls, focus on safety and clear work areas. Make sure you control the power properly, remove anything blocking the walls, and plan where wires will enter and exit.
Turning Off Power Safely
Always start by turning off the power to the area where you’ll work. Find your circuit breaker panel and identify the breaker for the room or outlet you plan to work on.
Flip the switch to the off position to cut electrical power. Use a voltage tester to double-check that no power is flowing in the wires you’ll handle.
This step prevents shocks or accidents. Make sure everyone in your household knows the power is off.
This avoids anyone accidentally turning it back on while you’re working. Safety comes first.
Removing Obstacles from Walls
Check the walls where you plan to run wiring. Remove baseboards, drywall panels, or other coverings that might get in your way.
Use a stud finder with wire detection to avoid drilling into existing wires or pipes. Clear space inside the wall cavity by removing insulation if needed.
This makes it easier to pull cables safely without snags. Keep tools like a drill, wire cutters, and fish tape handy.
These help you work through the walls neatly and efficiently.
Marking Entry and Exit Points
Carefully mark where the wires will enter and exit the walls. Use a pencil and tape measure to outline the exact spots on the drywall.
Make sure these points align with electrical boxes or outlets you plan to connect. Check height and location for easy access later.
Create holes using a drill or keyhole saw, sized just large enough for cables. This keeps the wall strong and reduces repair work after installation.
Running Electrical Wiring Through Walls
Running electrical wiring through walls means carefully creating space for wires and guiding them safely to their destination. You need to make holes where wires will pass and move wires between studs.
Keep them secure, and sometimes pull wires across rooms.
Drilling Holes and Making Access Points
Start by drilling holes through the center of the wall studs or joists. This helps protect wires from nails or screws during drywall installation.
Use a drill bit slightly larger than the cable diameter to avoid pinching the wires. Make sure to avoid plumbing, pipes, or existing wires when choosing where to drill.
A stud finder with wire detection can help find safe spots. Keep holes at least 1.25 inches away from the stud edge to prevent damage from nails.
If you must drill near edges, use metal protective plates to shield the wires.
Threading Wires Between Studs
After making holes, thread the wires through the wall cavities. Use fish tape or a wire puller to guide wires through tight spots, especially over long distances or multiple corners.
Pull wires gently to avoid damaging insulation. If you hit resistance, back up slightly and try again.
Label wires on each end to keep track, especially if running multiple cables through the same wall. Leave extra wire length at both ends for connections.
Securing Cables Inside Walls
Once the wires are in place, secure them to the studs using cable staples or straps. Space these fasteners about every 4 to 6 feet to prevent sagging.
Make sure staples are snug but do not pinch the cable. Pinching can damage the wire sheath and cause electrical problems.
Keep cables away from sources of heat or moisture. Avoid kinking the wire.
Follow local building codes on how wires must be secured.
Pulling Wires Across Multiple Rooms
When running wires across rooms, plan the route before starting. Use existing openings like doorways or baseboards to reduce damage.
If needed, cut small access holes at the top or bottom of walls to help guide the wire. Use a fish tape to pull wires through long stretches, feeding it from one access point to another.
Label wires clearly to keep your work organized. This prevents confusion later when making circuit connections.
Connecting Wires to Outlets and Switches
When running wiring through walls, connect the wires carefully to outlets, switches, and circuit breakers. Correctly attaching wires to junction boxes, breakers, and installing wall plates keeps your setup safe and working well.
Attaching Wires to Junction Boxes
Strip the wire ends to expose about ¾ inch of copper. Inside the junction box, match the wire colors: black (hot), white (neutral), and green or bare copper (ground).
Connect each wire to the matching screw or terminal. Tighten screws firmly but don’t over-tighten and damage the wires.
Make sure no bare wire is exposed outside the terminals. Use wire nuts for connecting wires together if needed.
Push wires neatly into the box without sharp bends. Secure the junction box to the wall stud before closing it up.
Connecting Circuit Breakers
Before you connect wires to your circuit breaker, switch off the main power. The black or hot wire goes to the breaker terminal.
The neutral (white) wire goes to the neutral bus bar, and the ground wire to the ground bus bar. Make sure each wire is fully inserted and tight under the screw.
Use the right size breaker matched to your circuit wire thickness to avoid overloads. For example, 12-gauge wire pairs with a 20 amp breaker.
Double-check all connections before turning power back on.
Installing Wall Plates
After wiring outlets or switches, attach wall plates to cover the junction boxes. Align the plate over the device and secure it with screws.
Choose wall plates made from flame-retardant materials for safety. Tighten screws so the plate is snug but don’t crack or bend it.
Wall plates protect your wires and give your walls a clean finished look. They also keep dust and moisture out of your electrical connections.
Testing and Troubleshooting Wiring
Testing your wiring helps you make sure everything works safely before you close up the walls. Troubleshooting lets you find and fix common problems like dead outlets or flickering lights.
Knowing these steps will save you time and keep your system safe.
Using Voltage Testers
A voltage tester is a great tool to check if your wiring has power. You can use a simple non-contact tester to see if wires or outlets are live without touching them.
Just hold the tester near the wire. It will light up or beep if power is present.
For more detailed checks, use a multimeter. Set it to measure voltage and test hot-to-neutral or hot-to-ground.
A reading close to 120 volts means the wire is live. Zero volts could mean the circuit is off or broken.
Always test the tester on a known live source first to make sure it works.
Identifying Common Wiring Issues
Look for signs like outlets that don’t work or lights that flicker or dim. Breakers that trip often can also signal a problem.
Flickering lights often come from loose or damaged wires. A breaker that trips frequently means too much current is flowing or there could be a short.
Check your circuit breaker box to find the affected circuit. If you smell burning or see scorch marks near outlets, stop immediately and find the cause.
These signs mean dangerous wiring problems that need fixing right away.
Fixing Loose or Faulty Connections
Loose connections cause lights to flicker and outlets to stop working. First, turn off power at the breaker to stay safe.
Unscrew the outlet or switch cover and pull the device gently from the box. Check all wire nuts and screw terminals to make sure wires are tight and secure.
If a wire looks damaged, cut off the bad section and strip fresh wire to reconnect. Replace any corroded or burned wires.
Use a screwdriver to firmly tighten terminal screws. When done, carefully tuck wires back, replace the cover, and turn power on to test.
Cleaning Up and Final Steps
After running wiring through your walls, tidy up the space and keep track of your circuits. Always follow safety rules.
Patching and Painting Walls
Once the wiring is in place, patch any holes or gaps in the drywall. Use joint compound or spackle to fill small holes, then sand the area smooth after it dries.
For larger holes, cut a drywall patch to fit and secure it. Apply compound around the edges.
After the surface is smooth, apply primer to the patched areas. This helps the paint stick well and hides the patch.
Finally, paint the area to match the rest of your wall. Take your time to blend the color so the repair looks seamless.
Labeling Circuits
Labeling your circuits clearly saves time later. Use a label maker or permanent marker to mark each breaker with the area or device it controls.
Create a simple chart for your breaker box, listing each circuit number next to its label. Keep this chart on or near the panel for easy reference.
Clear labels help electricians and anyone else working in your home to understand your system quickly.
Ensuring Compliance with Electrical Codes
Follow local electrical codes to avoid safety risks and legal issues. Codes cover things like wire type, circuit placement, grounding, and protection from damage.
Check with your city or county building department to get code requirements before you start. If you’re unsure about the rules, consider hiring an electrician to inspect your work.
Proper grounding and securing wires inside walls are important to meet code and keep you safe. Inspectors look for neat wiring, correct breaker sizes, and good connections to prevent hazards.
Extra Tips for Safe Electrical Work
Working with electrical wiring inside walls takes careful planning and attention. Know when to get professional help and how to stay safe when working with live wires or tools.
When to Call a Licensed Electrician
If you’re unsure about local electrical codes or rules, call a licensed electrician. They know how to keep your wiring safe and up to standard.
Avoid doing electrical work if you notice old or damaged wiring. A professional can assess the condition and replace parts safely to prevent fire hazards.
If you’re adding new circuits or outlets, hiring a pro ensures your system can handle the load without tripping breakers or causing overloads.
Protecting Yourself from Hazards
Always turn off the power at the circuit breaker before starting any wiring work. Use a voltage tester to double-check that the power is off before touching wires.
Wear rubber-soled shoes and insulated gloves to reduce the risk of electrical shock. Keep your work area dry and avoid standing on wet surfaces.
Use tools designed for electrical work and make sure they are in good condition. Never rush the job.
Taking your time helps avoid mistakes that can lead to injury or damage.
Frequently Asked Questions
Running electrical wire through walls involves methods to avoid damage. You need the right tools for safe installation and techniques for needs like mounting a TV or running wires vertically.
You can also learn how to run wires outside the wall neatly when needed.
What’s the best technique to thread electrical wire through existing finished walls?
Use fish tape or a wire coat hanger to guide the wire through the wall cavity. You may need to create small access holes behind outlets or switches to feed the wire through.
Using a stud finder with wire detection helps you avoid hitting existing wiring or pipes while threading the wire. Always turn off power before starting.
What are the steps for feeding cables through a wall for a wall-mounted TV?
First, plan the cable path from the outlet to the TV mount location. Cut an access hole behind the outlet and another where the TV will be mounted.
Use a flexible fish tape to push the cable through the wall. Pull the wire gently until it reaches the TV location.
Cover the holes with wall plates for a clean finish.
How can I run electrical wire horizontally across walls with minimal damage?
Use low-profile wire channels or raceways on the wall surface to avoid cutting drywall. You can paint these to match the wall color.
If running inside the wall, carefully cut small holes near studs and use fish tape to pull wire horizontally. Patch holes with drywall compound afterward.
Can electrical wire be run outside the wall, and how can that be done neatly?
Yes, you can run wire on the wall surface using wire moldings or conduits. Choose plastic or metal raceways that match your room decor.
Secure the wiring with adhesive clips or screws to keep it tidy. This method works well when you want to avoid drywall damage or need a temporary setup.
What is the correct method to run wires vertically within a wall cavity?
Run vertical wiring alongside studs through drilled holes near the center. This helps you avoid nails or screws during drywall installation.
Drill clean holes through the studs, keeping wires about 1.25 inches from the edge. Protect them with nail plates if needed.
Maintain a straight vertical path for easier pulling and safety.
What tools are needed for fishing wire through walls without cutting into the drywall?
You need fish tape or a wire puller. Use a stud finder with wire detection.
You might also need a small drill to make access holes behind outlets. Flexible rods or wire snake tools help reach longer distances.
A flashlight helps you see inside the wall. A measuring tape helps you locate studs and plan the wire path.