
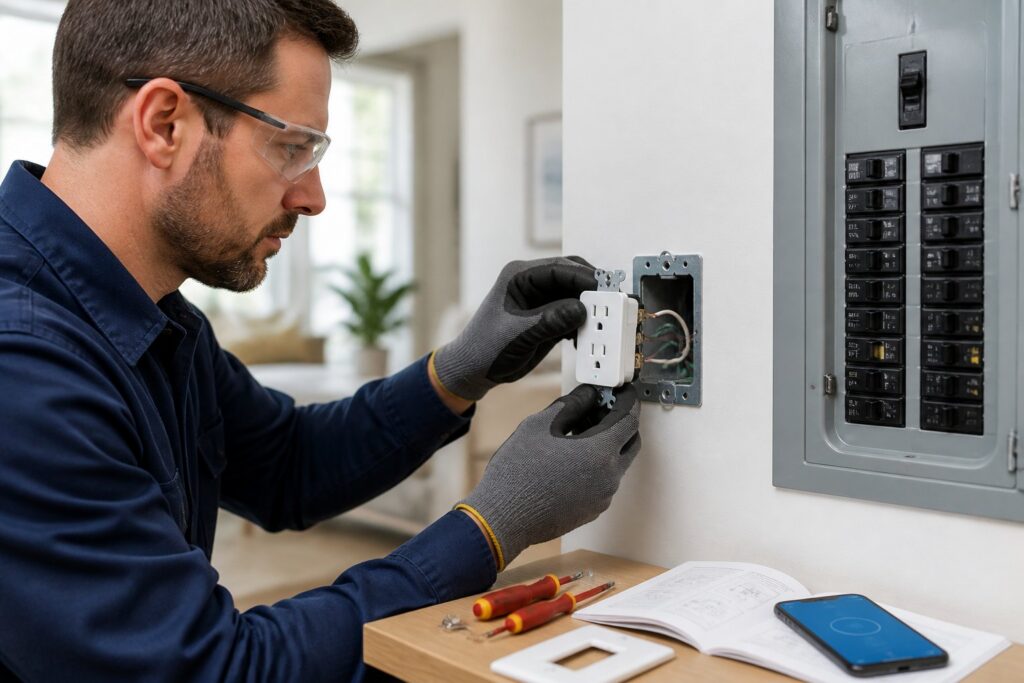
So, you want to install smart outlets at home. The basics? Pick the right device, check your wiring, and always turn off power before you touch anything. A smart outlet gives you remote control, scheduling, and voice features, and those in-wall ones really modernize a room—no bulky adapters everywhere.
Match the outlet to your wiring, double-check that the circuit is dead, and if something looks weird—old wires, odd boxes, anything—just stop and call a licensed electrician. That’s especially true in older homes, where you might run into surprises that aren’t obvious at first.
Smart outlets are a solid upgrade if you want more control over lamps, fans, or even those holiday lights. If you go slow and stay organized, most homeowners can handle the job.
How Smart Outlets Work
Smart outlets let you control power with an app, voice assistant, or an automation schedule. Some swap out your wall receptacle, others just plug in and let you control whatever’s plugged into them.
Which one’s best? Depends on where you want control and how much rewiring you feel like doing. In-wall types look neater, but plug-in models are a breeze to add or remove.
Plug-In Vs. In-Wall Models
Plug-in smart plugs are the easiest. Just stick them in a standard outlet, then plug your device into the smart plug.
In-wall smart outlets actually replace the existing wall outlet. They look cleaner and free up space—super handy behind furniture or in busy spots.
Wi-Fi, Z-Wave, and Matter Compatibility
Wi-Fi smart outlets hook straight to your home network and are quick to set up. Z-Wave models need a compatible hub but can be great if you’ve already got a home automation system.
Matter-compatible devices are meant to play nice with all the big platforms, so you’re not stuck with one brand. Always double-check the outlet works with your phone, router, and voice assistant before you buy—makes life easier.
Safety Checks Before You Start
Before swapping any outlet, make sure the circuit can handle the load and the wiring looks good. This step helps you avoid tripped breakers, overheating, or sketchy connections.
Take a few minutes to check out the setup before you open the box. It’s a small step that can save you a headache—or worse.
Confirming Circuit Capacity
Look at what else is on the same circuit. If you’ve already got heavy stuff like space heaters or big appliances, maybe don’t add more.
A smart outlet itself doesn’t draw much, but the device plugged into it does. Make sure the outlet’s rated for your use and the circuit isn’t maxed out.
Testing for Grounding and Proper Wiring
Use a plug-in tester or a multimeter to check for proper grounding and wiring. You want hot, neutral, and ground in the right spots before you mess with anything.
If you see brittle insulation, loose wires, heat marks, or no ground wire, stop. That’s a good time to call a licensed electrician.
Tools and Materials You Will Need
Getting everything ready first makes the install smoother. Grab your basic hand tools, a tester, and make sure you’ve got the right outlet for the space.
Choosing the right device matters just as much as the wiring. Bathrooms, garages, and outdoor spots usually need different ratings than a bedroom.
Essential Hand Tools
You’ll need a flathead and Phillips screwdriver, voltage tester, wire stripper, needle-nose pliers, and electrical tape. A flashlight’s super helpful—those boxes get dark when the power’s off.
Keep wire connectors and the mounting screws close. If the box is crowded, snap a pic or jot down wire positions before you pull anything out.
Choosing a Device Rated for the Location
Match the outlet to the room. Dry, indoor spots usually need a standard model, but outdoor or damp areas need a weather-rated device.
Check the amperage, voltage, and any smart-home standards before buying. It’s only useful if it’s rated for your space and works with your app.
Step-By-Step Replacement Process
The replacement process is pretty straightforward if you move slowly and keep track of every wire. The most important thing? Make sure the power’s off before you touch anything.
Tackle one outlet at a time. That keeps things clear and helps you avoid mixing up wires.
Shutting Off and Verifying Power
Flip the right breaker at your panel. Then use a non-contact voltage tester at the outlet to double-check that power’s actually off.
Don’t trust the breaker label alone. Honestly, I’ve seen mislabeled panels too many times to skip this step.
Removing the Existing Receptacle
Take off the cover plate, loosen the mounting screws, and gently pull out the old outlet so you can see the wires.
Snap a photo before disconnecting anything. It’ll save you if the box has more than one cable.
Connecting Line, Load, Neutral, and Ground
Attach the incoming hot wire to the line terminal, neutral to neutral, and ground to the green screw or ground lead. If your smart outlet has load terminals for downstream protection or switching, follow the device diagram exactly.
Tighten everything snugly, and make sure no bare copper sticks out. Loose wires can cause heat and all sorts of problems.
Mounting and Restoring Power
Gently fold the wires back into the box, mount the outlet, and put the cover plate back on. Make sure it sits flush and doesn’t pinch anything.
Turn the breaker on and test the outlet with a lamp or small device. If it doesn’t work, stop and check your wiring before trying again.
Setup, Testing, and Automation
Once you’ve got the outlet in, move on to app setup and smart features. Honestly, this part’s usually easier than the wiring—and it’s when the fun begins.
Test every function, not just on and off. You want to know the schedules, timers, and voice commands work like you expect.
Pairing With the App
Open the manufacturer’s app and follow their pairing steps. Most smart outlets blink or have a reset button for setup mode.
Keep your phone close and make sure you’re on the right Wi-Fi band if it asks. If pairing fails, reset the outlet and try again—double-check your network name and password.
Creating Schedules and Voice Controls
Start with simple automations. Set a lamp schedule, a morning routine, or an evening shutoff.
If you use Alexa or Google Home, link the outlet through their app and try a basic on/off command. Keep it simple at first, then add more once you’re sure it works.
When to Call a Licensed Electrician
Some jobs just aren’t DIY-friendly, especially if the wiring isn’t what you expected. If you spot damage, confusing layouts, or code issues, it’s smart to pause and call a pro.
A licensed electrician can also help if you’re planning multiple upgrades at once. That’s common if you want outlets, lighting, and other devices all working together.
Older Wiring, GFCI, and Multi-Wire Branch Circuits
Older homes might have cloth wiring, no ground, crowded boxes, or funky circuits. GFCI-protected spots and multi-wire branch circuits can get tricky if you’re not used to them.
If the outlet shares a box with another circuit or the wire colors don’t make sense, don’t guess. That’s when you really need a licensed electrician.
Planning Larger Smart Home or Commercial Upgrades
If you’re thinking about more than one smart outlet, plus lighting, fan controls, surge protection, or EV charging, it’s worth having a plan. A licensed team can map loads, check your panel, and set things up safely.
Magnify Electric is a solid choice for Residential and Commercial Electrical Work. Our licensed electricians handle automated lighting, ceiling fans, light switches, Lutron smart home systems, EV charging outlets and wall-mounted chargers, outdoor lighting, outlet services, recessed lighting, TV installs, whole-home surge protectors, wiring, panel upgrades and repairs, troubleshooting, portable generator hookups, smoke and CO₂ detectors, and all sorts of electrical improvements for homes and businesses. We serve Spicewood, Austin, Bee Cave, Lakeway, Dripping Springs, Georgetown, Leander, Round Rock, Kyle, Cedar Park, Liberty Hill, Westlake, The Hills, Briarcliff, Horseshoe Bay, Sunset Valley, Hutto, and the Central Texas area.
Frequently Asked Questions
Do I need a neutral wire to replace a regular outlet with a smart outlet?
Most in-wall smart outlets do need a neutral wire to power the electronics inside. If your box doesn’t have one, you’ll need a different model or professional help.
What tools and safety steps should I follow before wiring a smart outlet?
Use a voltage tester, screwdrivers, wire stripper, and a flashlight. Turn off the breaker first, then test for power at the outlet itself—not just the panel—so you know the circuit’s really dead.
How do I connect a smart plug to Wi‑Fi if the app can’t find it?
Reset the smart plug, make sure your phone’s on the right Wi-Fi network, and stand close during setup. If it’s still not showing up, check if your router uses a supported band—most devices only pair on 2.4 GHz.
How can I set up a smart plug to work with Alexa?
First, connect the plug in its own app, then link that account inside Alexa. After that, ask Alexa to discover devices or add it manually if needed.
How can I set up a smart plug to work with Google Home?
Set up the plug in the manufacturer’s app, then connect that service in Google Home. Once linked, you can assign it to a room and control it by voice or routine.
What kinds of devices should I avoid plugging into a smart plug?
Steer clear of plugging in heavy-duty or high-heat devices—unless you’re absolutely sure your smart plug can handle them. Stuff like space heaters, air conditioners, or even certain power tools often pull more current than you’d expect, and that can get dicey fast. Always double-check the ratings before you risk it; better safe than sorry, right?