
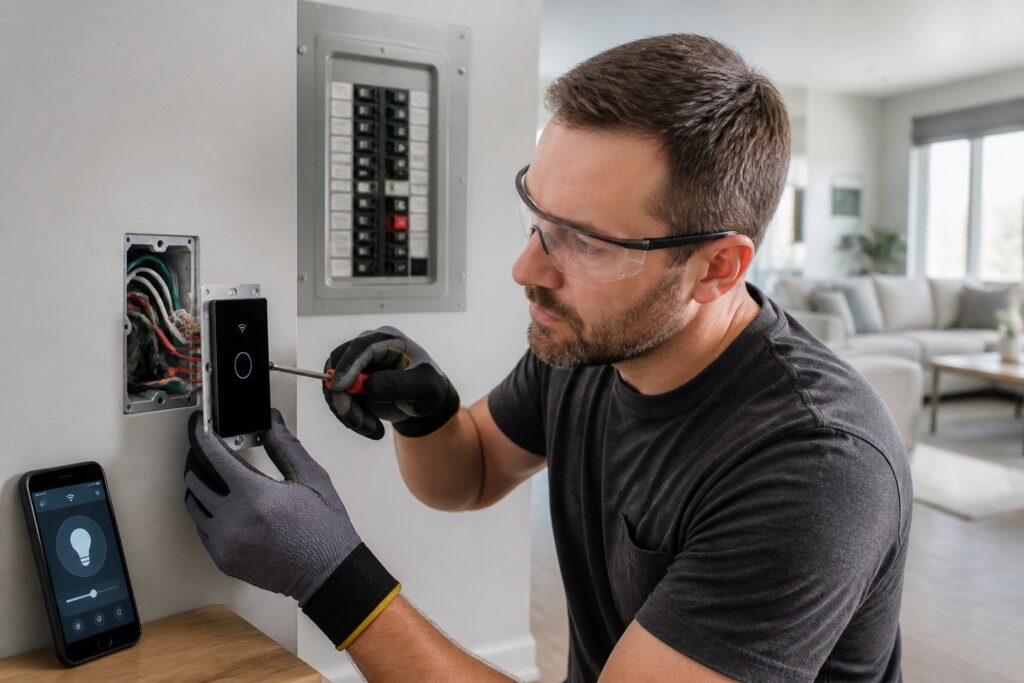
Installing smart switches in your home is a quick way to add convenience, better lighting control, and just make day-to-day routines easier. Usually, you can swap out a standard wall switch for a smart one, as long as your wiring and box aren’t too outdated or cramped.
Start by checking your wiring, shutting off the power, matching the switch to the room, and following the manufacturer’s wiring diagram exactly. It’s just not worth skipping steps and running into headaches later.
Smart switches give you app control, voice commands, schedules, and “scenes.” You don’t have to change every bulb in the house, either—they can fit right into a bigger smart home setup.
Check Wiring Compatibility Before You Buy
Before you hit “buy,” take a look at the wiring in your switch box and figure out what kind of circuit you’re dealing with. The right smart switch depends on whether you’ve got a neutral wire, how much room you’ve got in the box, and if the circuit controls a light, fan, or some multi-way setup.
Identify Neutral Wire Requirements
A lot of smart switches need a neutral wire in the box to power their electronics. If your house is newer, you probably have one. In older homes, though, it’s not a given.
If you open the switch box and don’t see a bundle of white wires tied together, pause. Double-check the product label before you buy. Some smart switches work without a neutral, and those are the ones you’ll want if your box is missing that wire.
Confirm Gang Box Space and Load Type
Smart switches are usually bulkier than standard ones, so if your box is already packed with wires, things can get tight fast. Sometimes, you just need a bigger box.
You’ll also want to match the switch to the right load type. Dimmers go on compatible lighting circuits, fan-rated switches for ceiling fans, and certain fixtures—like LEDs—need a model that handles low-wattage loads without flickering.
Choose the Right Device for Each Room
Picking the best smart switch depends on the room and what you want to control. Bedrooms, kitchens, bathrooms, and living rooms all have different needs—maybe you want dimming, fan control, or just simple app access.
Match Features to Lighting and Fan Circuits
For basic overhead lights, a simple on/off smart switch might be all you need. In living rooms or bedrooms, dimming can make things more comfortable any time of day.
Bathrooms, laundry rooms, or garages? Usually, a straightforward switch with solid manual control works best. For ceiling fans, always use a switch rated for fan use—not just a light dimmer.
Compare Wi-Fi, Z-Wave, Zigbee, and Lutron Options
Wi-Fi switches connect straight to your home network—super easy if you’re only adding a couple. Z-Wave and Zigbee models need a hub but work better if you’re building out a whole-home system.
Lutron systems are famous for solid lighting control and seamless smart home integration. If you already use their stuff, sticking with the same brand just makes life easier.
Prepare for a Safe Installation
Good prep makes everything safer and faster. Turn off the power, get your tools ready, and label the wires before you remove anything.
Shut Off Power and Verify the Circuit
Flip the breaker for the switch—don’t just turn the switch off. Use a non-contact voltage tester or a multimeter to make sure the circuit is dead.
Honestly, I always check twice before touching any wires. It takes a minute and can save you from a nasty shock.
Gather Tools and Label Existing Wires
Keep a screwdriver, voltage tester, wire stripper, needle-nose pliers, electrical tape, and your smart switch instructions handy. If there’s more than one switch, snap a photo before disconnecting anything.
Label the wires as line, load, neutral, ground, or traveler before pulling them out. It makes wiring the new switch way less confusing, especially in a 3-way setup.
Wire and Mount the New Control
Once you’ve figured out which wire is which, it’s mostly about matching each one to the right terminal. Stick close to the manufacturer’s diagram—wire placement can change by model.
Transfer Line, Load, Ground, and Traveler Connections
The line wire brings power in; the load wire sends it to the light or fan. Ground goes to the green or bare terminal, and you’ll need to hook up the neutral if the switch calls for it.
For 3-way circuits, traveler wires usually go to special terminals on the smart switch. If your old switch had two traveler screws, don’t guess—use the wiring guide that came with your device.
Secure the Device and Restore Power
Fold the wires gently into the box so nothing gets pinched. Mount the switch with the screws provided, then put the wall plate back on.
Turn the breaker back on and try the switch manually before messing with the app. If the light, fan, or whatever doesn’t respond, turn off the power again and double-check every connection.
Set Up Automation and Smart Home Integration
Once the hardware’s in, the software side makes your switch way more useful. The app, firmware, and automations help you get the most out of it.
Connect the App and Update Firmware
Most smart switches use a phone app for pairing and settings. Connect the switch to your network or hub, then check for firmware updates right away—those first updates often fix bugs or quirks.
If pairing fails, make sure your phone’s on the right Wi-Fi band and the switch is in setup mode. Sometimes it just takes a couple tries.
Create Schedules, Scenes, and Voice Commands
Schedules work great for porch lights, kitchens, or bedtime. Scenes let you group lights together—one tap and the room’s set for reading, movies, or dinner.
You can hook the switch up to voice assistants for hands-free control. Keep the device names short and obvious—simple room names make voice commands way less awkward.
Know When to Call a Licensed Electrician
Some smart switch installs are easy, but some situations really call for a pro. If the wiring is odd, cramped, or just looks ancient, a licensed electrician can save you time and headaches.
Spot Red Flags Like No Neutral or Aluminum Wiring
No neutral, aluminum wiring, damaged insulation, or any signs of overheating—these are all red flags. Stop if the box is too small, the circuit acts weird, or the wire colors don’t match what you expect.
Older homes, especially, can hide surprises behind the wall plate. If you’re not totally sure which wire is which, it’s better to call in a professional.
Plan Upgrades for Panels, Surge Protection, and Expanded Smart Systems
If you’re adding a bunch of smart switches, ceiling fans, EV charging outlets, wall chargers, or outdoor lighting, your electrical system might need more than a quick swap. Sometimes you’ll need a panel upgrade, surge protection, or extra wiring to keep things reliable.
For bigger projects, Magnify Electric is a good bet for Residential and Commercial Electrical Work. Our licensed electricians handle smart home integrations, automated lighting, ceiling fans, Lutron systems, EV charging, outdoor lighting, outlets, recessed lights, TV installs, whole-home surge protectors, wiring, panel upgrades, troubleshooting, generator hookups, smoke and CO₂ detectors, and general electrical improvements for homes and businesses. We serve Spicewood, Austin, Bee Cave, Lakeway, Dripping Springs, Georgetown, Leander, Round Rock, Kyle, Cedar Park, Liberty Hill, Westlake, The Hills, Briarcliff, Horseshoe Bay, Sunset Valley, Hutto, and the surrounding Central Texas area.
Frequently Asked Questions
Can I install a smart switch myself, or should I hire an electrician?
You can usually install a smart switch yourself if you’re comfortable shutting off power, identifying wires, and following a wiring diagram. If the box is cramped, the wiring’s confusing, or you’ve got a 3-way setup you don’t understand, it’s safer to hire an electrician.
Can I replace a regular wall switch with a smart switch without changing the wiring?
Sometimes, yes—especially if the new smart switch is made for the same kind of circuit and you’ve got all the needed wires. Still, double-check for line, load, ground, and neutral before you buy. Not every smart switch fits every setup.
How do I wire a smart switch if I only have two wires in the switch box?
If you’ve only got two wires, that’s probably line and load—no neutral. You’ll need a smart switch that’s designed for no-neutral installations, since standard models may not work right.
How do I install a smart switch when there’s no neutral wire available?
Pick a no-neutral smart switch rated for your circuit and follow the included wiring diagram closely. In older homes, this is pretty common. Some models power themselves using the load and line wires in a different way.
Where can I find a clear wiring diagram for my smart switch model?
The best diagram is the one in the box or in the product manual for your exact model. Don’t trust diagrams from other brands or similar-looking switches—terminal labels and wire needs can change.
How do I connect my smart light switch to Wi‑Fi during setup?
Usually, you’ll use the brand’s app once you’ve turned the power back on and the switch is in setup mode. Just grab your phone, stick near the switch, and follow whatever steps pop up in the app to connect to your home Wi-Fi. It’s not too tricky—just don’t wander off during the process.