Replacing an old outlet can seem daunting, but it’s a manageable task that can enhance the safety and functionality of your home. To start the process, ensure you turn off the power to the outlet at the circuit breaker before removing it. This simple step can prevent potential electrical hazards and set the stage for a smooth replacement.
Learning how to replace an outlet yourself not only saves you money but also empowers you with valuable skills for future home projects. At Magnify Electric, our team of licensed electricians is ready to assist you with any electrical needs, ensuring your outlets are up to code and safely installed. Whether you’re tackling basic lighting changes or need additional electrical outlets, we are your go-to source for residential and commercial electrical work.
When you take on the replacement of an old outlet, you’re contributing to your home’s overall safety and efficiency. If you ever feel unsure about the process, the experts at Magnify Electric are here to help, ensuring peace of mind as you enhance your living space.
Understanding Electrical Outlets and Safety Essentials
Knowing the specifics about electrical outlets and ensuring safety is crucial before proceeding with any electrical work. A sturdy understanding can help you make informed decisions when replacing an old outlet or adding new ones.
Types of Outlets and Receptacles
Electrical outlets vary based on their function and application. The most common types include:
- Standard Outlet: Typically, a 120-volt outlet with two slots for plugs.
- GFCI Outlet: Ground Fault Circuit Interrupter outlets help prevent electrical shock. They are crucial for areas with water exposure, such as kitchens and bathrooms.
- Smart Outlet: These allow remote control via smart devices, enhancing convenience.
- Surge Protector: This outlet type protects your devices against voltage spikes.
Identifying which outlet to use is essential for maintaining safety and functionality in your home.
Electrical Safety Precautions
Safety must be your top priority when working with electrical outlets. Here are essential precautions:
- Turn Off Power: Always switch off power at the circuit breaker before starting any work.
- Use Insulated Tools: Ensure you use insulated tools to minimize shock risk.
- Test Before Touching: Use a voltage tester to confirm that the outlet is not live.
- Wear Protective Gear: Use rubber gloves and safety goggles to protect yourself from potential hazards.
Following these precautions can greatly reduce the risk of accidents during your project.
When to Call a Professional
While many outlet replacements can be done yourself, some situations warrant a professional. Consider reaching out to our team at Magnify Electric if:
- You are unsure about the electrical code regulations in your area.
- You experience frequent tripping of circuit breakers.
- The outlet shows signs of damage, such as burn marks or loose connections.
Magnify Electric specializes in both residential and commercial electrical work. A licensed electrician can ensure the job is done safely and correctly, saving you time and potential future costs.
Required Tools and Materials
When replacing an old outlet, having the right tools and materials is crucial for a safe and effective job. This section will detail essential tools, help you choose the suitable replacement outlet, and outline necessary personal protective equipment.
Essential Tools List
Before you begin, gather the following tools:
- Screwdrivers: You’ll need both flathead and Phillips screwdrivers to remove the outlet cover and unscrew the outlet itself.
- Wire Stripper: This tool is essential for stripping the insulation off the ends of the wires.
- Voltmeter or No-Contact Voltage Tester: Use this to ensure that the power is off before you start working.
- Pliers: Needle-nose pliers can help with wire manipulation and connection.
- Drill: A drill may be required for making new holes, especially if you’re installing a GFCI outlet in a new location.
Make sure your tools are in good condition to avoid accidents and ensure efficiency.
Choosing the Right Replacement Outlet
Selecting the correct outlet depends on your needs. For standard applications, a three-prong outlet is commonly used, providing a good ground connection.
If your area is prone to moisture, consider installing a GFCI outlet, which is designed to prevent electrical shock.
When purchasing, check the amperage rating on your old outlet. Most residential outlets are rated for 15 or 20 amps. Always choose a replacement that matches this rating for safety.
Personal Protective Equipment
Safety should always be a priority. Equip yourself with the following items:
- Safety Goggles: Protects your eyes from debris while you work.
- Electrical Gloves: These provide insulation from electric shock.
- Dust Mask: If you’re cutting into drywall or making adjustments, a mask will help keep dust out of your lungs.
At Magnify Electric, our team of licensed electricians can assist you with all aspects of electrical work, from basic outlet replacements to full residential and commercial projects. For any uncertain tasks, trust professionals to handle it safely.
Preparing for the Outlet Replacement
Before you begin the process of replacing an old outlet, it’s crucial to ensure safety and proper preparation. This involves shutting off power, testing the outlet for voltage, and inspecting the outlet box. Following these steps will help prevent accidents and ensure a smooth replacement process.
Shutting Off Power at the Service Panel
Start by locating your service panel, typically found in a basement, garage, or utility room. Open the panel to access the circuit breakers.
Steps to follow:
- Identify the breaker that controls the outlet you are replacing.
- Flip the breaker to the “off” position.
- Label the breaker if necessary for future reference.
Make sure the area is well-lit to avoid mistakes. It’s wise to inform others in your home or workplace that electrical work is happening. Properly shutting off power protects you from electrical shocks during the process.
Testing for Voltage
Once you’ve turned off the power, always confirm that the outlet is not live. Using a voltage tester is essential for your safety.
How to test:
- Insert the tester’s probes into the outlet slots.
- Ensure the tester lights up, indicating there is no voltage.
If the tester does not react, the outlet is safe to work on. Always prioritize this step; it eliminates the risk of shock. If you’re unsure or facing difficulties, consider contacting Magnify Electric. Our licensed electricians are ready to assist with all your electrical needs.
Removing the Outlet Cover and Inspecting the Outlet Box
With the power confirmed off, proceed to remove the outlet cover. Use a screwdriver to unscrew the cover plate, then set it aside.
Next, gently pull the outlet from the wall using the screws holding it in place. Inspect the outlet box for any signs of damage or loose wires.
Key things to check:
- Look for frayed or exposed wires.
- Ensure the outlet box is secure and not cracked.
This inspection is vital because any defects can cause future problems. If everything looks good, you are ready to proceed with installing the new outlet. If issues are apparent, don’t hesitate to consult professionals. Magnify Electric offers expertise in handling repairs safely and efficiently.
Step-by-Step Outlet Replacement Process
Replacing an old outlet requires careful attention to safety and proper handling of wiring connections. Follow these detailed steps to ensure a successful outlet replacement, allowing for safe and effective use of electrical appliances.
Disconnecting and Removing the Old Outlet
Before you begin, turn off the power at the circuit breaker. Use a voltage tester to confirm the outlet is not receiving electricity. Remove the outlet cover plate by unscrewing it. Next, unscrew the outlet itself from the electrical box.
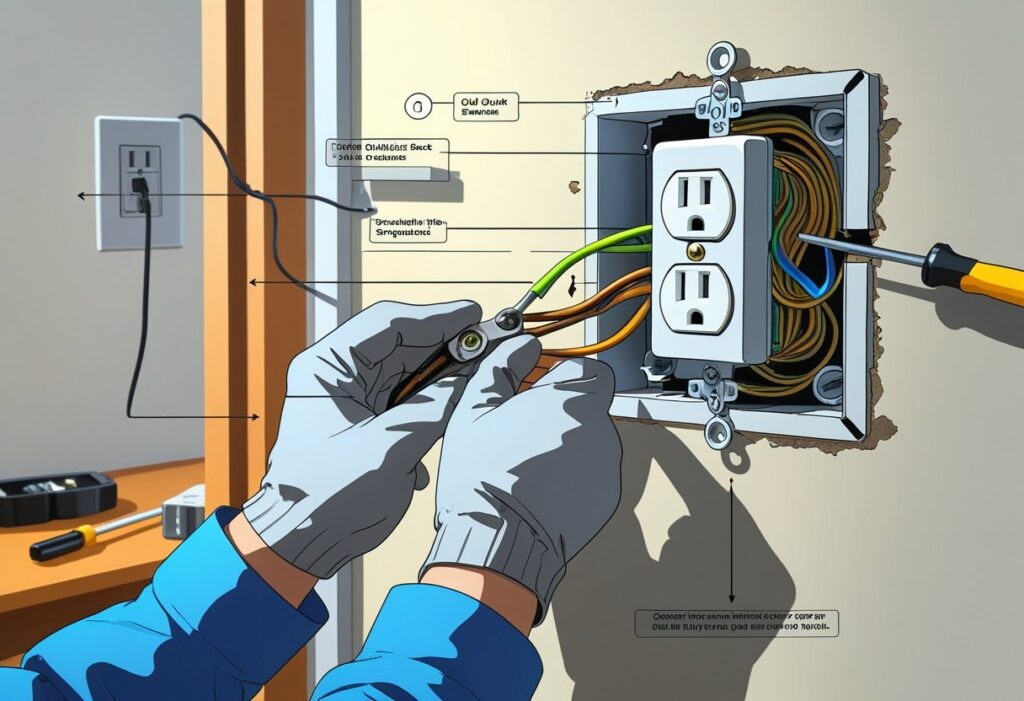
Carefully pull the outlet out of the box to expose the wiring. Take note of how the wires are connected. Usually, you will see two wires connected to the terminals: one black (hot) and one white (neutral), along with a bare copper wire for grounding. Disconnect each wire using a screwdriver, making sure to keep track of which wire connects to which terminal.
Inspecting and Identifying Wiring Connections
After removing the old outlet, inspect the wiring for any signs of damage, such as fraying or discoloration. If any wires appear damaged, replace them before installing the new outlet.
Identify the ground wire, typically bare or green. Ensure that all wire connections can handle the new receptacle. Familiarize yourself with the wiring layout from the old outlet. If you are uncertain, take a photo for reference. This will be crucial when connecting the new outlet.
Installing the New Outlet or Receptacle
Begin by preparing the new outlet. If it’s a standard duplex receptacle, you’ll find brass screws for the hot wires and silver screws for the neutrals. Connect the black wire to the brass terminal and the white wire to the silver terminal.
Attach the ground wire to the green terminal. Ensure each connection is tight and secure. Gently push the wires back into the electrical box and position the new outlet into place. Secure it with screws, ensuring it is aligned properly within the box.
Before replacing the cover plate, double-check your connections.
Securing Ground Wire and Finalizing Wiring
Ensure the ground wire is securely attached and any exposed wires are well insulated. Once the outlet is positioned, replace the cover plate and tighten its screws.
Finally, restore power at the circuit breaker and test the outlet using a voltage tester or plug in a device to confirm it is operational. If you need assistance throughout this process, consider reaching out to Magnify Electric, where our licensed electricians ensure all your residential and commercial electrical needs are met efficiently and safely.
Testing, Finishing, and Safety Checks
After completing the installation of your new outlet, it’s crucial to ensure everything is functioning correctly and safely. Testing the outlet for voltage, addressing any troubleshooting needs, and adhering to safety compliance are essential steps in this process.
Restoring Power and Functional Testing
Before restoring power, double-check that all screws are tightened and the outlet is securely attached to the wall. Turn the breaker back on and check for proper voltage using a multimeter. A standard outlet should read about 120 volts, while a GFCI outlet should reset without issue.
Plug in a device to the outlet to confirm proper functioning. If it powers on, that’s a positive indicator. Additionally, you can use a circuit tester to verify that each slot in the outlet has power. This ensures that both hot and neutral connections are correct and safe for use.
Troubleshooting Common Issues
If you encounter problems, you may need to troubleshoot. If the outlet does not work after power restoration, first ensure the circuit breaker hasn’t tripped. If it has, reset it and check again.
For GFCI outlets, pressing the reset button is essential. If it keeps tripping, there might be an underlying issue in the wiring or connected devices. Inspect the connections to ensure wires are properly terminated. If you’re uncomfortable with electrical work, it’s wise to consult a licensed electrician from Magnify Electric for assistance.
Ensuring Safety Compliance
Safety checks are critical to ensure your outlet is compliant with local electrical codes. Verify that all connections are secure and that the wires are properly insulated. Ensure that you’re using a three-prong outlet for grounding, especially in wet areas.
Additionally, check that your outlet is rated for the expected load. For example, a standard outlet can handle 15 amps, while those designed for higher voltage appliances should be correctly rated. If tasks seem daunting, consider contacting Magnify Electric—we specialize in residential and commercial electrical work, ensuring safety and compliance during every project.
Frequently Asked Questions
This section addresses common questions regarding the replacement of electrical outlets. Understanding these key topics ensures a safe and efficient process for both residential and commercial electrical work.
What are the steps to replace an electrical outlet with three wires?
To replace an outlet with three wires, first, turn off the power at the circuit breaker. Remove the outlet cover and screws, then pull the outlet from the wall. Identify the wires: the black (hot) wire connects to the brass screw, the white (neutral) wire connects to the silver screw, and the bare or green wire (ground) connects to the green screw.
What safety precautions should be taken when replacing outlets in an old house?
When replacing outlets in an older home, ensure the power is completely off before beginning. Use a voltage tester to confirm that no electricity is present. It’s also wise to check for any signs of damage or outdated wiring. Consider hiring a licensed electrician from Magnify Electric if you’re unsure about the home’s wiring.
How can I switch a two-prong outlet to a three-prong outlet?
To convert a two-prong outlet to a three-prong outlet, verify that the circuit is grounded. Replace the two-prong outlet with a three-prong outlet and connect the new outlet to the ground wire. If there is no ground wire, consult with a professional to determine the best course of action, as additional upgrades may be needed for safety.
What is the process for replacing an electrical outlet with four wires?
Replacing an outlet with four wires involves similar steps to standard replacements. After shutting off power and removing the existing outlet, identify the wires: two hot wires (black), one neutral (white), and one ground (bare or green). Properly connect each wire to the new outlet, ensuring it’s firmly in place.
When is it necessary to replace a power outlet with a GFCI?
Replacing a standard outlet with a Ground Fault Circuit Interrupter (GFCI) is necessary in areas prone to moisture, such as kitchens and bathrooms. These outlets help protect against electrical shocks. If your home does not have GFCI protection in critical areas, consider upgrading.
Are there specific considerations when changing outlets and switches together?
When changing outlets and switches simultaneously, ensure each turn off the corresponding circuit breakers. Be mindful of the wiring, as outlets and switches might share circuits. Keeping a clear awareness of wiring configurations is essential to avoid complications in both functionality and safety. For comprehensive assistance, Magnify Electric offers expert help tailored to your needs.